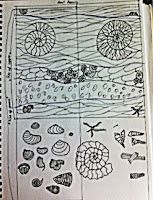
and have been collecting them for many years, some myself and others I have purchased. I love the subtle patterns that have been imprinted on pebbles and rocks over millennia. I spend hours clambering over rocks on beaches around our coastline. These panels evolved from my Rock of Ages panels and incorporate fossils that I own and that I have studied and gazed at in museums.
I began by making a life size cartoon of my planned design.
Then I pierced out the sheet of copper using my large Knew saw.
Next I apply the liquid enamel using brushes and sponges.
When each piece is dry, I scratch through to reveal the bare copper beneath. They are then fired.
The next step is to add sifted jewellery enamels which are then fired. I finish by adding fused glass beads and gold detail. Next comes the serious business of selecting the pebbles, shells and slate that will complement each piece. This can take a while to get the look I require.
All the pieces are then payed out onto MDF and cemented in place.


No comments:
Post a Comment